
DIY sticker pack with Mustard x Cricut
Our rainbow of lockers is already a pretty delightful sight, but there's always room for more joy! These stickers will dress up your locker and brighten up your day. Minimalists, look away now!
We've teamed up with Cricut to create a downloadable pack of custom-made happy stickers, ready to be cheerfully plastered across your locker of choice.
You might have seen us using these designs on our Instagram stickers and filters, but now we're sharing them with you. We can't wait to see what you create with them!

what you need:
- Mustard Made Locker
- Cricut Maker 3 Machine
- Our downloadable happy stickers template
- Cricut SmartVinyl in your colour(s) of choice
- Cricut Transfer Tape
- Cricut Weeding tool
- Cricut Scraper tool
- Scissors
step by step:
one.
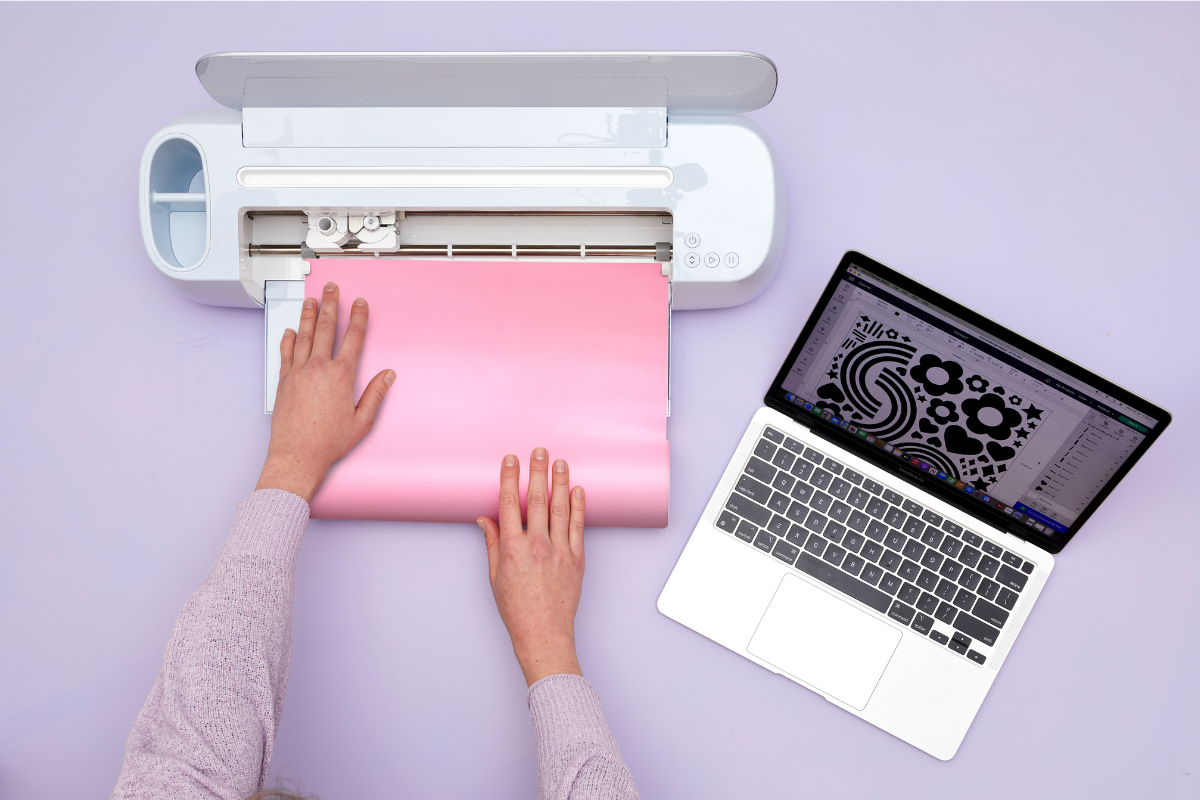
Using either your laptop, desktop, phone or tablet, import our downloadable happy stickers template into the Cricut Design Space app. This design has been arranged with the stickers tightly positioned to minimise vinyl waste. Once it's set up, load your vinyl into the Cricut machine.

two.
Using the weeding tool, carefully remove the negative space.
three.
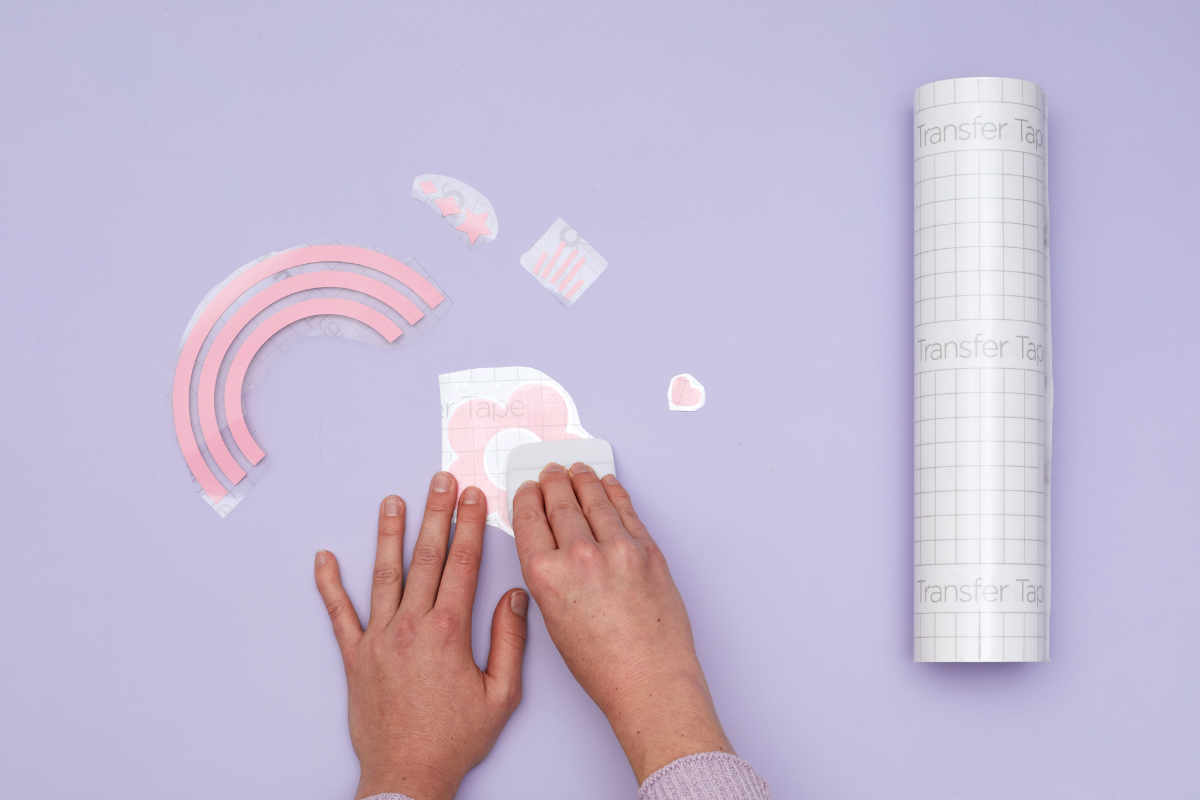
Cut the vinyl designs into smaller, individual stickers. Then apply Transfer Tape over each piece, using the scraping tool to make sure the application is smooth, with no air bubbles. Slow and steady is usually the best method here!

four.
One sticker at a time, remove the backing from the vinyl, and position it wherever makes you happy! Press the design down and slowly work across the surface with the scraper tool. Peel off the Transfer Tape (you can save this to reuse a few more times), and repeat this process for as many stickers as you'd like.

five.
Sit back and admire your happy handiwork!

